
Feature Article
Insulating Old Masonry Buildings
Letting brick dry evenly is the key to avoiding water problems
By: Dan Morrison and Sal Alfano
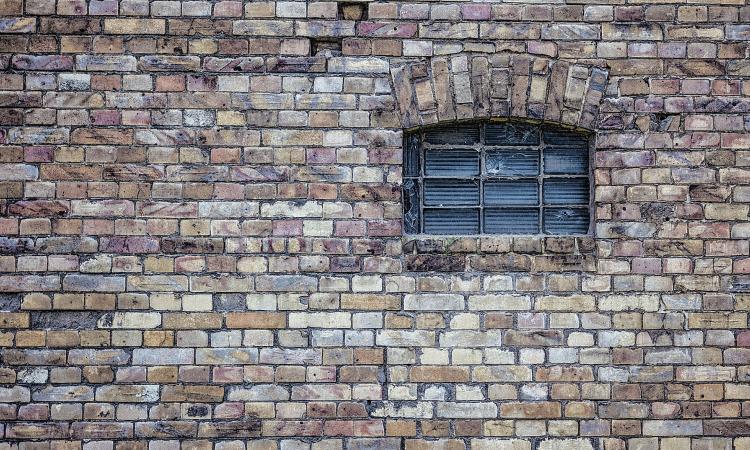
Many older masonry buildings are built using a structural brick wall. Instead of adding an exterior veneer layer of brick to a wood or steel framework as is done today, a structural brick wall uses several adjacent layers or wythes of brick to serve as both structure and finish surface. These buildings are typically uninsulated, so any moisture absorbed by the brick is able to dry to both the inside and outside. In cold climates, heat transfer through the brick prevents freezing much of the time, and where some freeze-thaw cycling does occur, higher-quality bricks are used in the outer wythe to resist spalling.
To improve energy efficiency, structural masonry buildings can be insulated, often by adding a layer of spray foam or rigid foam to the interior face of the wall. One problem with this method, however, is that it changes the vapor profile so that the wall can only dry to the outside. And because an insulated brick wall will be colder than an uninsulated brick wall, the brick will stay wet for longer. Plus, the freeze line moves inward toward the insulation. If the wall gets wet, as it inevitably will, all of these factors can conspire to cause spalling, efflorescence, and other damage (such as rotting at the ends of joists, which are commonly set into pockets in the brick).
A Better Approach
In milder climates with shorter, less severe freeze-thaw cycles, this insulation method may not cause problems. But a better approach is to incorporate a vented airspace between the brick and the insulation (see illustration, opposite). It offers both energy efficiency and improved drying, which means that efflorescence and freeze-thaw spalling are less likely to occur. (Plus, it is reversible, which is often a requirement of historical review boards.)
As a general rule, insulation is riskier in cold, wet climates, and the risk increases as the amount of insulation increases. But if heat loss is a problem, this solution is better than simply applying insulation directly to the interior side of the brick.
That said, it’s not a panacea, and the risk of brick damage is affected by the following factors:
- More rain increases risk.
- A colder climate increases risk.
- More insulation increases risk.
- Low-quality bricks increase risk.
Before insulating masonry walls, closely inspect them, inside and out, for any preexisting water damage. Inspect all walls for which you are considering insulation because brick quality can vary—good bricks were often used for the front elevation but lower-quality bricks were used on the sides and back of the house. If you find existing damage, that may mean water is already a problem, so making it harder for absorbed water to dry may be a bad idea.
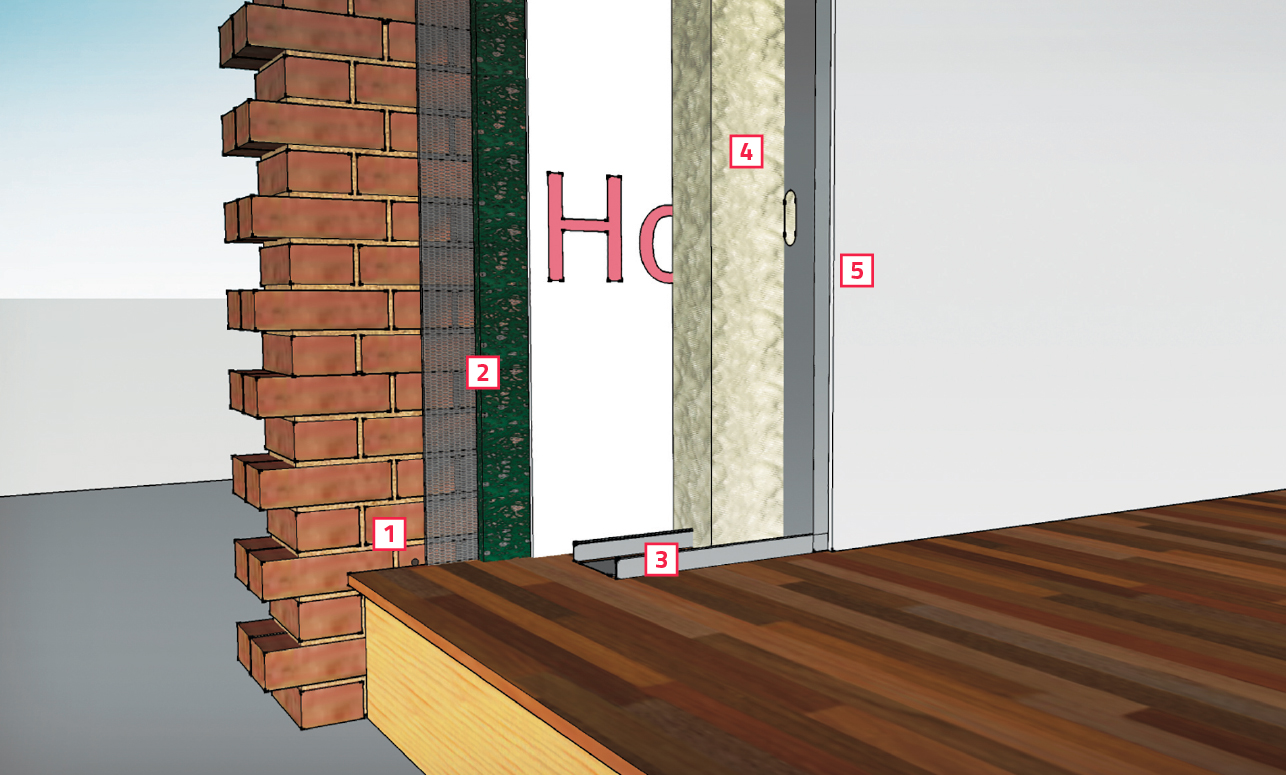
Illustration: Dan Morrison
Step by Step
[1] Working from inside, drill a series of small-diameter drainage holes at floor level, angling them down toward the outside. These can be left empty or fitted with weep tubes equipped with wicks to promote drainage. As an alternative, replace every second or third vertical mortar joint with weep mesh or similar material.
[2] Install a fibrous drainage mat against the brick. Use a material such as Mortairvent Rain Screen, which comes in thicknesses of 0.25 and 0.40 inches and has an integrated insect screen. It also has a fabric backing, which will keep the next layer (spray foam) from clogging the mesh. (If you use a mesh without backing, a layer of housewrap, as shown, will accomplish the same thing.)
[3] Build a wood- or steel-framed wall spaced away from the drainage mesh enough that spray foam can flow into a continuous layer against the drainage mesh. Add wiring and other concealed work in the wall.
[4] Spray the wall with foam, which should also completely cover the rim joist in the ceiling.
[5] Add drywall or other interior finish material.
This article was originally published in Professional Remodeler 2017.